You are here: Navigating the Software > Setting User Options
Setting User Options
You can set user preferences in the User Settings dialog box.
- Select the Welcome tab.
- From the Home Ribbon, select Options.

- The Software Options dialog box appears. Select an option from the left column to set preferences.
- When you have adjusted the options to your liking, click OK. Your preferences will be adjusted accordingly.
General Settings
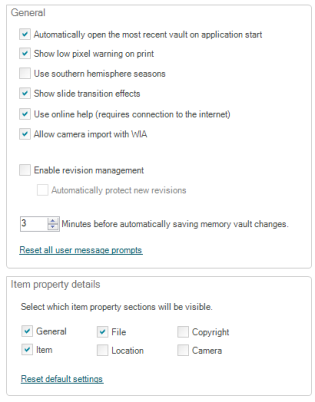
Select the check boxes next to the options you want:
| Options |
Explanations |
| Automatically open the most recent vault upon application start |
This option opens the vault you last opened when you start the application. |
| Show low pixel warning on print |
This option displays a warning if your photo has a low resolution and will not print well. |
| Use southern hemisphere seasons |
Select this check box if you want Historian to associate "Summer" with December and so forth. This affects the "fuzzy dates" used in the Timeline. |
| Show slide show transition effects |
This shows transitions effects within your created slide shows. |
| Use online help |
You can choose to use a more aesthetically pleasing online help file, but you must be connected to the Internet. Without an Internet connection, you can still access a more basic help file. |
| Allow camera import with WIA |
When you import from a camera, you can choose the basic camera import or the WIA setting. Most newer computers support WPD, which is a better way to communicate with cameras. If the software says no cameras are available when importing from a camera, check this option. |
| Enable revision management |
You may turn on or off revision management. If this option is selected, the Revisions button appears in the Editors panel. To learn more about revision management, refer to Using Revisions. |
| Automatically protect new revisions |
This option is only available if revision management is selected. A protected image cannot be modified. Any modifications made to a protected image will be saved to a new revision. |
| Minutes before automatically saving vault changes |
Minutes before any changes to a vault are saved. |
| Reset default settings
|
This option restores the software to its original default settings. |
| Item property details
|
Historian allows you to store and update metadata, or item properties. You can choose which item property sections are visible.
|
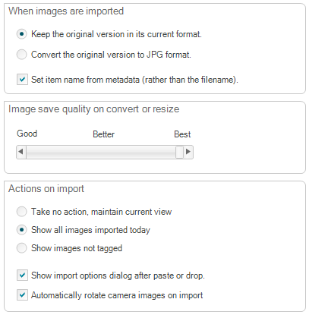
Imports
| Option |
Explanation |
| When images are imported, keep the original version in its current format. |
Select this if you want to maintain the original image file format after import. |
| When images are imported,convert the original version to JPG format. |
Select this option if you want to convert TIFF, PNG, GIF, and BMP files to the JPG format when first imported into Historian.
|
| Set item name from metadata (rather than file name)
|
Select this if you want the metadata to dictate the item name as opposed to using the file name. |
| Image save quality on convert or resize slider |
Choose the quality in which you want the image saved when you convert it or resize it.
- Best: Largest file size with very little loss of information
- Better: Large file size with a minimal loss of information
- Good: Medium file size with some noticeable distortion
|
| Actions on import
|
Choose which media library view you wish to see immediately after import:
- Take no action, maintain current view
- Show all items imported today (default)
- Show items not tagged
|
| Show import options dialog after paste or drop |
Treat items that are drag and dropped or pasted into Historian the same as other imported items and display the Import Options dialog box. |
| Automatically rotate camera images on import |
Rotate camera images correctly when imported into Historian. If you have taken a portrait-style photo, displayed by your camera as landscape, Historian will automatically correct the display. This setting is selected when you first install the software. |
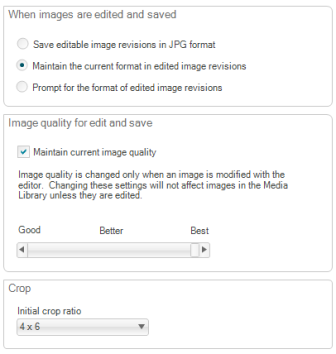
Editing
| Options |
Explanation |
| When images are edited and saved ...
|
You can choose to modify the file extension when you edit an image.
- Save editable image revisions in JPG format
- Maintain the current format in revisions (default)
- Prompt for the format of revisions
|
|
Image quality for edit and save
- Maintain current image quality
- Image quality slider
|
- You can choose to maintain current image quality when saving a new revision by ticking the checkbox. The software will determine the quality of the image.
- Alternatively, you can adjust the slider so that edited images are saved as the selected image quality.
- Best: Largest file size with very little loss of information
- Better: Large file size with a minimal loss of information
- Good: Medium file size with some noticeable distortion
|
| Initial Crop Ratio
|
This option allows you to set the size of the initial crop box (crop ratio) in the Crop panel during editing. It defaults to 4 x 6. |
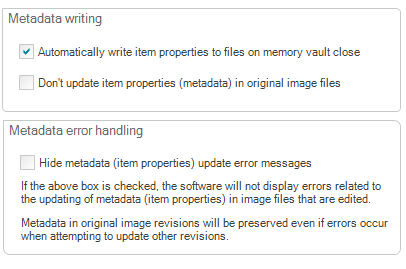
Metadata
Historian 4.0 writes metadata to your vault, saving more and detailed information about each file.
Metadata is "data about data." Each piece of metadata serves as a building block that tells you more about that file. For example, an individual image may include things like the file name, description (story), and rating.
| Options |
Explanations |
|
Metadata Writing:
- Automatically write item properties to files on media vault close
- Don't update item properties (metadata) in original image files
|
If keywords or metadata are already associated with a file, it will be included when the file is imported into the software. Metadata is updated when an image is exported outside the vault, when the vault is closed, or when you manually update the information.
- You can choose to automatically write the new / changed item properties to files whenever a media vault is closed.
- You can choose to only update revisions but not to update the metadata in your original image files in your vault.
|
|
Metadata error handling
- Hide metadata (item properties) update error messages
|
If this box is ticked, the software will not display errors relating to updating metadata (item properties) in image files that are edited.
Metadata in original image revisions will be preserved even if errors occur when attempting to update other revisions.
|
Backup
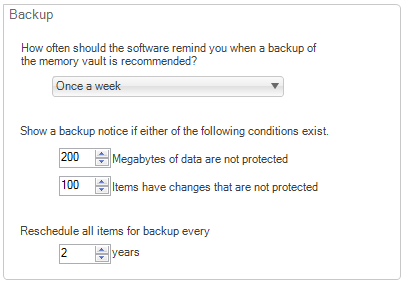
- Set the frequency of backup reminders. The system defaults to once a day, but may be changed to less often by selecting an option from the drop-down menu.
- Adjust reminders based on the amount of the following:
- Megabytes of unprotected data (defaults to 200)
- Items that have changes and are not protected (defaults to 100)
- Set a full backup of everything on an annual basis.
Email
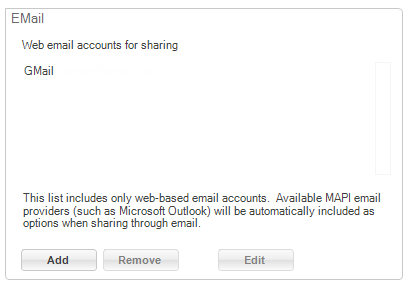
You can add email accounts for sharing. The application automatically includes MAPI email accounts, such as those in Microsoft Outlook. This dialog allows you to set up web email accounts such as Gmail, Yahoo, and Hotmail. Click Add to quickly add a web-based email account.
Notes:
- Accounts must have an open interface to their SMTP servers. Your SMTP settings are available from your email provider.
- After editing custom settings, the software attempts to communicate with your email server to ensure the settings work. This causes a slight delay when you click OK. If the software is unable to connect using the specified settings,you will be asked if you want to confirm the settings regardless.
Learn more about adding email accounts.
Automatic Updates
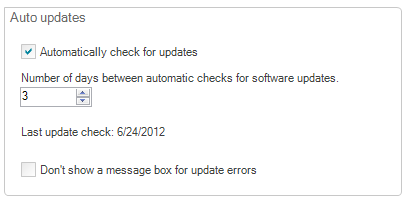
These options control the automatic updating feature of Historian . Set the number of days between automatic checks for updates to the software. You must be connected to the Internet to use this feature.
If you have an update error, a dialog box will display with an error message. You can turn off this notification in the Don't show a message box for update errors checkbox.
Note: Your computer is attempting to access the Internet to update your software. You may see a message from your security software (such as Norton, McAfee, or Microsoft). Choose Always Allow from the available options to allow the software to always access the Internet for software updates and/or printing to the Web.
Available updates are also displayed in the Application News section of the Welcome tab.
Spell-Checking
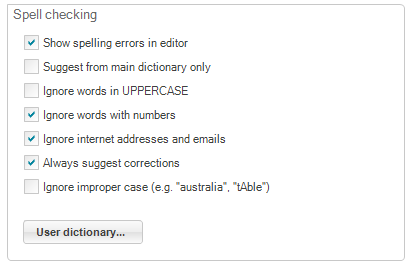
These options set the default rules for spell-checking. You can set basic spelling settings that apply to journaling boxes, telling your story, and anywhere else you may be entering text.
You can also add specific words to the default dictionary.
- Click User dictionary.
- The User Dictionary dialog appears. Add a word in the field near the bottom of the box.
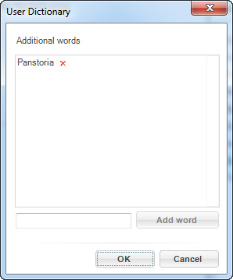
- Click Add Word. The word is now added to your personal dictionary and will not be flagged as misspelled.
Technical Support
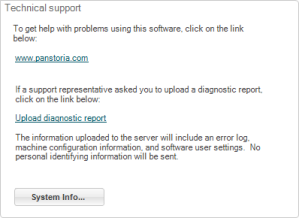
This dialog gives you information on technical support available via the Panstoria web site. If you talk with a customer support representative, they may ask you for a diagnostic report. A customer service representative may also ask for your system information, which is accessible from the System Info... button.
If a support representative asked you to upload a diagnostic report, perform the following steps:
- Click Upload diagnostic report.
- A confirmation dialog box appears. Click Yes to upload and send the report.

- A dialog box displays confirming the report was sent. Click Yes to dismiss the box.
| |
|
|
| |
© 2005-2013 Panstoria, Inc.
|
|
