
| Download the PDF User Guide | ||
|
|
||
You may assign dates and times to an item. Several different options are available for assigning dates, from specific to fuzzy. Months can be specified by number, accepted abbreviations, or full name.
Notes:
Examples:
|
Date entered: |
System-assigned date |
|
1/14/72 or 1/14/1972 |
January 14, 1972 |
|
August 30, 2003 |
August 30, 2003 |
|
Aug 30, 2003 |
August 30, 2003 |
|
1/14/72 3:00 PM |
January 14, 1972, 15:00 hours |
|
12/2004 |
December 1 - 31, 2004 |
|
December 2004 |
December 1 - 31, 2004 |
|
winter of 1993 |
12/1/1992 through 3/31/1993 |
|
October 1985 |
October 1985 |
|
Circa May 2001 |
May 2001 |
|
spring 1956 |
3/1/1956 through 6/30/1956 |
|
summer '69 |
5/15/1969 through 9/30/1969 |
|
autumn (or fall) 1942 |
9/1/1942 thorough 11/30/1942 |
|
early 1977 |
1/1/1977 through 6/30/1977 |
|
late 1933 |
7/1/1933 through 12/31/1933 |
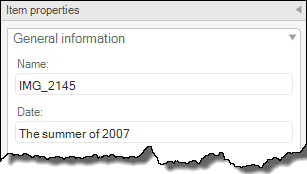
Although the system is assigning a location in the timeline to your item based on the date you entered, the text of the date you entered remains the same.
Example: If you enter Summer of '69 into the Item Properties panel, you will continue to see Summer of '69 in the panel whenever you view that item. However, you will also be able to pull up the item on the timeline between May 15, 1969 and September 30, 1969.
When you first import items into Historian , they display by Date Imported. To view media by the date assigned to each file, click the Media button in the Timeline Options.
To assign a date to an item, perform the following steps:
1. Select the item in the Media Library.
2. Click the Item Properties panel.
3. Add or change the date listed in the Date field. If you are unsure of a date, use a "fuzzy" date, as in the examples above.
4. Click on the item again to confirm the change. If you are viewing larger thumbnails, you will notice the date change in the left corner of the thumbnail.
| © 2005-2013 Panstoria, Inc. |
|